


Three things stop most washer and dryer damage claims before they start: clean and drain the units 24 to 48 hours ahead, lock the drum with transit bolts or foam blocks, and load them upright with straps against the truck wall. Skip any one of these and you risk a leaking hose in transit, a cracked drum suspension, or a mover who simply refuses the appliance at the curb. Gas dryers add one more rule: a licensed technician handles the disconnect, no exceptions.
TL;DR:
- Ensuring the pump filter is drained and the drum is dry 24 to 48 hours before moving prevents leaks and mildew during transit.
- Installing transit bolts on front-load washers or securing top-load drums with foam blocks protects internal suspension springs from damage.
- Gas dryers must be disconnected and reconnected by a licensed technician to avoid fire hazards, unlike electric models that only need power unplugged.
- Moving appliances upright and fully strapped in the truck prevents internal shifting and suspension damage, especially for front-load washers.
- Completing all disconnection steps and confirming proper securing minimizes the risk of refusal or damage by movers, which is often caused by skipped or rushed prep.
Table of Contents
- What Does Washer Dryer Moving Prep Actually Involve?
- Washer Prep: Cleaning, the Pump Filter, and Transit Bolts
- Dryer Prep: Electric vs. Gas, Vent Cleaning, and Cord Handling
- Disconnecting Water and Managing Residual Water Safely
- Securing, Wrapping, and Loading the Appliances
- In-Truck Securing: How Movers Position Washers and Dryers
- Arrival and Reconnection: What to Do First
- Pre-Move Checklist and Timeline
- Why Movers Refuse Unprepped Appliances
- A Mover’s View on Appliance Prep Nobody Talks About
- Let AMB Moving & Storage Handle the Appliances
- Sources
- FAQ
What Does Washer Dryer Moving Prep Actually Involve?
Washer dryer moving prep is the set of steps that keeps a laundry pair from leaking, rattling apart, or getting rejected by your moving crew on move day. In the industry, this falls under “appliance disconnection and securing,” and it covers four jobs: drying out residual water, disconnecting hoses and power safely, immobilizing internal parts for transit, and loading the unit so it survives a ride in a truck that brakes hard on the interstate.
Homeowners often treat this as an afterthought behind boxing up the kitchen. It shouldn’t be. A washer that still has a cup of water sitting in the pump housing will find a way to drip through your cardboard and onto whatever’s stacked below it. A front-load washer moved without its transit bolts can shift its drum against the outer frame hard enough to snap the suspension springs, which typically means a repair bill rather than a warranty claim, since most manufacturers treat improper transit as user error.
Washer Prep: Cleaning, the Pump Filter, and Transit Bolts
Start the process 24 to 48 hours before the truck arrives. Run one hot cycle with either a washer-cleaning tablet or a cup of white vinegar, then leave the door open so the drum and gasket dry out completely. A damp seal packed into a moving blanket for three days is how mildew smell becomes a permanent houseguest.
- Drain the pump filter. Most front-loaders hide it behind a small panel at the bottom front corner. Set down towels, place a shallow container under the opening, and twist the filter counterclockwise to release the water that’s still sitting in the pump housing.
- Disconnect the hoses. Turn off both supply valves, then unscrew the inlet hoses over a bucket. Pull the drain hose free and let it empty completely before coiling it.
- Install transit bolts. Front-load washers ship with bolts that lock the drum to the cabinet, and they need to go back in before the machine moves. If yours were tossed at installation, replacement sets typically cost a small fee through the manufacturer’s parts site. Top-load washers don’t use bolts. Use a tub lock or wedge foam blocks between the drum and cabinet instead.
- Bag and label every bolt, clamp, and hose separately, and snap a photo of the hookup before you disconnect anything.
If your machine has no front access panel for the filter, don’t force it. Gently tilting the washer toward the rear right corner after the hoses are off lets residual water drain from the pump housing, but never tip past roughly 45 degrees and always keep a catch container underneath.
Pro Tip: Keep the labeled parts bag taped inside the washer drum, not in a moving box. It’s the first thing you’ll want when you reconnect at the new place, and drums are one spot movers never pack over.
Dryer Prep: Electric vs. Gas, Vent Cleaning, and Cord Handling
Electric and gas dryers need almost opposite handling, and mixing up the steps is where most damage and delay happens.
- Unplug electric dryers at the outlet, not the breaker, so you can inspect the cord. Note whether it’s a 3-prong or 4-prong plug. Older homes sometimes have the wrong outlet type at the destination, and forcing a cheater adapter onto a mismatched plug is a fire risk, not a workaround.
- For gas dryers, shut off the gas valve, then stop. Disconnecting the line yourself risks a leak that’s invisible until it isn’t. A licensed technician handles both the disconnect before the move and the reconnection after, and most movers will expect this step to already be scheduled, since it usually carries a separate service fee.
- Pull the vent hose free and bag it separately from the dryer. Clean the lint trap and the exhaust duct opening. If the flex duct at your old place is more than a few years old, plan to replace it at the destination rather than reinstalling a brittle one.
- Tape the door shut, coil the cord and secure it with tape or a zip tie, and wrap the whole unit in a moving blanket before it leaves the laundry room.
Disconnecting Water and Managing Residual Water Safely
Water left inside hoses or hookups is the single most common cause of moving-day puddles, and it’s avoidable in about ten minutes of work.
- Shut off both the hot and cold supply valves behind the washer. If the valves are stuck or missing, turn off the water main for the house before you touch anything.
- Lay towels and a bucket under the connection points, then loosen the hose fittings slowly. Water under residual pressure can spray farther than expected. Let both hoses drain fully, then drain the pump filter as described above.
- If the washer’s plug is hard to reach, cut power at the circuit breaker instead. Never touch any electrical connection with wet hands or while standing in a puddle.
Hose age matters here too. Standard rubber hoses have a useful life of around five years, while braided stainless hoses last roughly seven to ten. If yours are original to a machine that’s older than that, replace them at the new house rather than reconnecting hoses that are already close to failing.
Pro Tip: Write the shutoff valve locations on a sticky note and leave it on the washer for the new owner or tenant, if you’re not taking the valves with you. It saves the next person from hunting behind a machine at midnight.

Securing, Wrapping, and Loading the Appliances
Transit bolts do more than protect the drum from banging around. They keep the entire suspension system rigid, and manufacturer guidance and mover checklists agree that skipping them is one of the fastest ways to void a warranty claim after a move. Snug them down evenly, not wrench tight, following the pattern in your owner’s manual.
- Strap the appliance to an appliance dolly at the midsection, tilt it back to roughly a 45 degree angle, and have a second person spot the load down stairs or thresholds.
- Use a ramp or a truck’s lift gate to load. Never try to muscle a 150 to 200 pound washer up to truck bed height by hand.
- Lay cardboard runners or furniture sliders across hardwood and tile paths, and keep moving blankets over doorframes and stair rails the dolly will pass.
- Cover the washer and dryer completely with moving blankets before they roll onto the truck, same as you would for any appliance that scratches or dents easily.
Front-load washer drums typically weigh 40 to 50 pounds on their own, and an unbolted drum swinging inside the cabinet during a stop-and-go interstate drive is exactly the scenario transit bolts exist to prevent.
In-Truck Securing: How Movers Position Washers and Dryers
Appliances go against the truck’s front bulkhead, standing upright, never laid on their backs or sides. Front-load washers in particular need to stay vertical because tipping them onto a side can shift internal counterweights in ways that cause vibration and noise long after the move is over.
- Strap each unit at two points, one across the middle and one higher up, cinched against a moving blanket so the strap doesn’t dig into the metal cabinet.
- Only place an appliance on its side if the specific manufacturer manual says it’s safe, and even then, treat it as a last resort.
- Confirm with your movers ahead of time that the washer and dryer are fully prepped. Some crews will decline to load appliances that aren’t drained and bolted, or add a fee for the extra handling time.
- Before the truck door closes, verify: bolts installed, cords taped down, hoses bagged and labeled, and every strap double-checked for tension.
Arrival and Reconnection: What to Do First
- Remove the transit bolts before you reconnect anything. Store them in a labeled bag inside the washer drum in case you move again.
- Reattach the inlet and outlet hoses by hand first, then snug the fittings with a wrench, careful not to overtighten and crack a plastic connector.
- Reconnect the dryer vent and plug in the electric cord, matching the same prong configuration you noted before disconnecting.
- For gas dryers, wait for the licensed technician to reconnect the line and test every joint with a soapy water solution. Bubbles mean a leak.
- Give the machines a couple of hours to settle before running anything, then run a short test cycle on each and watch for leaks, unusual vibration, or error codes.
Pre-Move Checklist and Timeline
- 48 hours out: Run a cleaning cycle, locate the transit bolts, and check that your truck route and doorways can handle the dolly.
- 24 hours out: Drain the pump filter, disconnect and bag both hoses, tape the doors and cords, and wrap each unit in blankets.
- Move day: Do a final drain check, load with the dolly and ramp, and confirm your movers have accepted both appliances as ready.
- After the move: Pull the transit bolts, level each unit, reconnect everything, run a test cycle, and swap out any hose older than five to seven years.
| Stage | Key Action | Why It Matters |
|---|---|---|
| 48 hours out | Clean cycle, locate bolts | Drum and gasket need time to dry |
| 24 hours out | Drain, disconnect, tape | Prevents leaks and loose parts in transit |
| Move day | Load upright, strap in truck | Protects suspension and cabinet |
| After the move | Reconnect, test cycle | Confirms no leaks or damage occurred |
Why Movers Refuse Unprepped Appliances
Crews turn down appliances more often than homeowners expect, and it’s rarely arbitrary. Missing transit bolts, a washer that still has standing water in the pump, an uncapped gas line, or a doorway that’s tighter than what was quoted are the four most common triggers for a refusal or an added fee at the door.
- Watch for red flags when vetting a moving company: no visible USDOT number, a vague answer about appliance handling, or reluctance to coordinate a licensed plumber or electrician for hookups.
- Ask any mover you’re considering three direct questions: does the quote include appliance disconnect and reconnect, who handles gas shutoff and reconnection, and what does the valuation coverage actually pay out if the washer arrives damaged?
Pro Tip: Get the appliance handling terms in writing before move day, not verbally on the phone. If a crew’s policy changes at your door, you want a quote to point to.
A Mover’s View on Appliance Prep Nobody Talks About
Most guides treat washer and dryer prep like a packing chore, something you knock out the night before with a roll of tape and a to-do list. From the loading dock side, it looks different. The appliances that cause problems on interstate runs aren’t the ones movers forgot to plan for. They’re the ones where the homeowner assumed “unplug it” counted as prep.
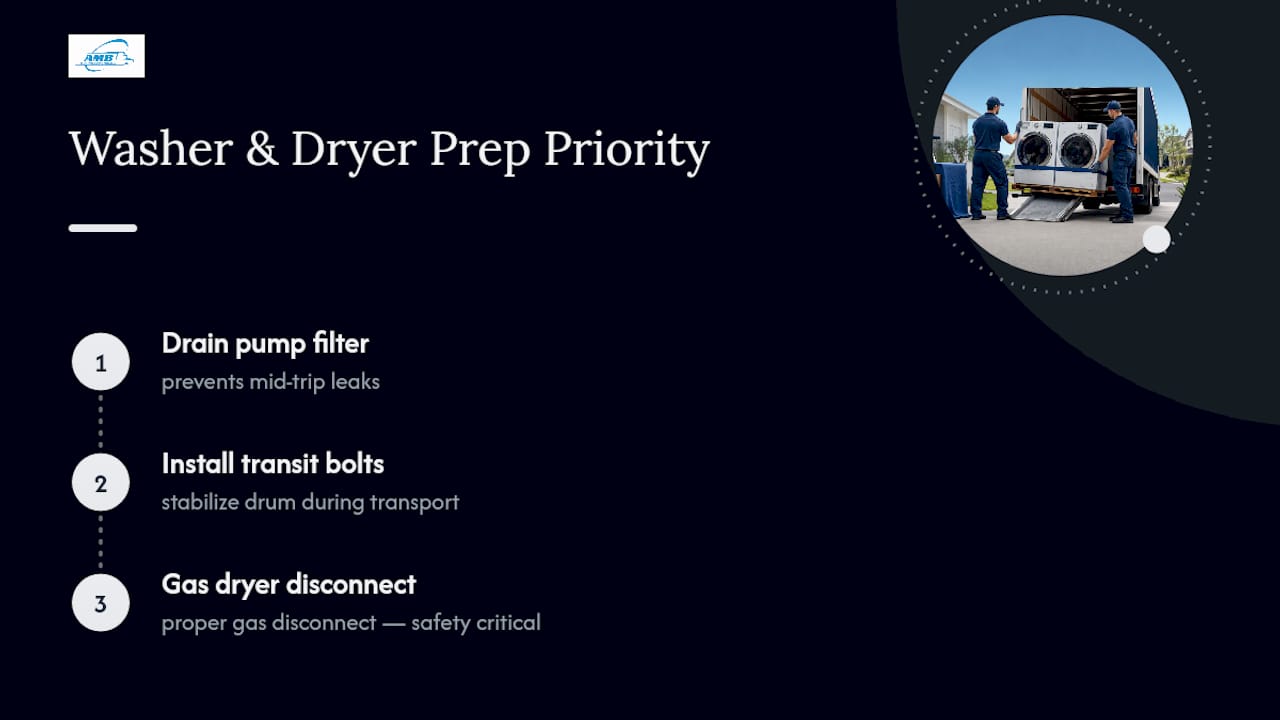
The conventional advice gets one thing backwards: it treats gas dryer disconnection as optional if you’re in a hurry. It isn’t. A rushed gas disconnect is the single prep step where cutting corners creates real physical risk, not just a scuffed cabinet. Everything else on this list protects your appliance. That one protects your house.
If there’s a single priority worth fixing first, it’s the drain pump filter. It’s the step homeowners skip most often because it’s hidden behind a panel most people never open in the machine’s lifetime, and it’s also the step that turns into a soaked moving blanket three states into a cross-country haul. Handle that one, install the transit bolts, and the rest of this checklist is mostly common sense executed on schedule.
— AMB
Let AMB Moving & Storage Handle the Appliances
Prepping a washer and dryer correctly takes real time, and if you’re also disassembling furniture and packing the kitchen, it’s easy to run out of hours before the truck shows up. Ambmovingservices builds appliance disconnection and reconnection into its professional packing services, so the drain, the bolts, and the wrapping get done by a crew that does it every week instead of once a decade.
For gas dryer lines and other jobs that need a license, Some moving companies coordinate with qualified trades to assist with licensed jobs like gas dryer line disconnects and reconnections. This coordination matters more on interstate moves than local ones, since a delayed reconnection can leave a family without laundry access for days in a new state. As a licensed and insured nationwide moving company, Ambmovingservices carries the compliance and valuation coverage that a refused or damaged appliance claim actually depends on.
If you’re planning a long distance move and want an accurate moving cost estimate that includes appliance handling, get a quote and tell the team what you’re bringing. It’s the fastest way to know exactly what your move will cost before the truck is booked.
Sources
- How to Move a Washing Machine Safely (Guidespot)
- How to move heavy appliances (Whirlpool)
- How much it costs to move washer and dryer + pump-trap detail (HomeGuide)
FAQ
How Do I Prepare My Washer and Dryer for Moving?
Clean and dry the washer 24 to 48 hours ahead, drain the pump filter and both hoses, install transit bolts or a tub lock, and disconnect the dryer’s power and vent. Gas dryers need a licensed technician for the disconnect, and both units should travel upright, strapped inside the truck.
Do Washing Machines Need to Be Drained Before Moving?
Yes. Residual water sitting in the pump housing or hoses will leak during transport if it isn’t drained first. Front-load washers especially need the front pump filter opened and emptied before the hoses come off.
How Long Does a Washer Need to Sit Before Moving?
Start prep 24 to 48 hours before the move so the drum, gasket, and hoses have time to air out fully. After arrival, let the machine settle for a couple of hours after reconnecting before running the first test cycle.
What Do I Need to Do Before Moving a Washing Machine?
Run a hot cleaning cycle, drain the pump filter and hoses, and install the transit bolts that lock the drum for front-loaders, or a tub lock for top-loaders. Tape the door shut, label and bag the hardware, and photograph the hose connections before disconnecting anything.
Will Movers Disconnect My Washer and Dryer for Me?
Some moving companies include basic appliance disconnect and reconnect in their packing services, but gas dryer lines always require a licensed technician regardless of who you hire. Ask any mover directly whether appliance handling is included in the quote, since Ambmovingservices builds this into its packing service rather than charging it as a surprise add-on.