
October 31, 2026
Packing Knives for Moving: A Safe Step-by-Step Method
How to pack kitchen knives for a move: wrap each blade, protect edges, box and label them so nobody gets cut, whether you move across town or across states.

Pack knives by covering every blade edge first, wrapping each knife on its own, locking it in place inside a small, sturdy box, and labeling that box so the person who opens it knows sharp blades are inside. A loose knife in a general kitchen box is the most common way a move turns into an injury or a punctured box of dishes. The method below takes about an hour for a full kitchen and costs only a few dollars in materials.
For long-distance relocations, AMB offers professional packing services to help prepare fragile and household items.
TL;DR
- Cover the edge of every knife with a guard, sheath or folded cardboard before any other wrapping.
- Wrap each knife separately in packing paper or bubble wrap, then pack them tight in a small box with no room to shift.
- Mark the box “SHARP KNIVES” on several sides and keep it with you or on top of the load, not buried.
- Do not carry knives in a carry-on bag if you fly: TSA requires them in checked baggage.
- If you hire interstate movers, tell the crew about the knife box, or ask them to pack the kitchen for you.
Table of Contents
- Why knives need their own packing method
- What you need before you start
- Step 1: Sort and thin out the knives
- Step 2: Clean and dry every knife
- Step 3: Cover the blade edge
- Step 4: Wrap each knife individually
- Step 5: Choose the right box and pack it tight
- Step 6: Label the box so nobody gets hurt
- Step 7: Keep the knife box accessible
- Step 8: Unpack carefully at the other end
- Special cases
- How much time and money it takes
- Our perspective: knives are a small item with a big consequence
- Let professionals pack the kitchen
- Quick checklist
- FAQ
- Sources
Why knives need their own packing method
Knives are different from plates or glasses. Fragile items break; knives injure. During a long-distance move a box may be stacked, shifted, tipped and carried up several flights of stairs by more than one person. A blade that has worked its way through a layer of paper can cut a hand reaching in to unpack, and a sharp edge that is loose in a box also dulls against other metal.
There are three risks to design around:
- Cuts to people. The movers, you, and whoever unpacks.
- Damage to the knife. Chipped edges, bent tips, and scratched handles from knocking against pots and tools.
- Damage to everything else in the box. Blades slice through thin cardboard dividers and paper wrapping, and ruin the dishes beside them.
Every step below addresses one of those three.
What you need before you start
Gather the materials first so you are not improvising halfway through a block of knives.
| Material | What it does | Notes |
|---|---|---|
| Corrugated cardboard strips or sheets | Forms a rigid guard around each blade | Cut from a spare box; the ridges give the best protection |
| Packing paper (unprinted) | First wrap around each knife | Newsprint can smear on handles |
| Bubble wrap | Second layer for expensive or long knives | Bubbles facing the knife |
| Painter’s tape or packing tape | Holds guards closed | Tape the guard, not the blade |
| Small, sturdy box | Holds the knives together | A small box keeps the total weight low |
| Crumpled paper or foam | Fills voids so nothing shifts | Pack until the box does not rattle |
| Marker | Warning labels | Bold, large letters |
If you own knife guards or the original sheaths for your knives, use them. Plastic blade guards are inexpensive and reusable, and they slide on in seconds. Treat them as the first layer, not a substitute for wrapping and boxing.
Step 1: Sort and thin out the knives
Moving is a good time to decide which knives you actually use. A drawer of dull steak knives, a chipped paring knife and a cleaver you have not touched in years are all things you would pay to move. Set aside the ones that are worth keeping and consider donating or responsibly discarding the rest. Never put a loose blade in the trash bag: wrap it as if you were moving it, and mark the package so sanitation workers are warned.
Then separate what remains into three groups:
- Everyday kitchen knives such as chef’s, paring, bread and utility knives.
- Valuable or specialty knives such as high-end Japanese knives, carbon-steel blades, and heirloom sets.
- Other sharp tools such as cleavers, boning knives, mandolines, graters, peelers and kitchen shears.
Packing by group lets you give the valuable knives more protection and keeps the box contents predictable.
Step 2: Clean and dry every knife
Wash and dry each knife completely. Food residue attracts pests in storage and a damp blade can rust during a move that takes several days, particularly with carbon steel. Dry knives with a towel right away rather than leaving them to air dry. If you are moving long distance and the knives may sit in a truck or storage unit, a very light wipe of food-safe mineral oil on carbon-steel blades is a common precaution among cooks, but it is optional for stainless steel.
Step 3: Cover the blade edge
This is the step that does the most for safety. A knife in its own sheath is already covered. For a knife without one, make a guard.

The method knife makers recommend for shipping a fixed-blade knife with no sheath is to fold corrugated cardboard around the blade with the sharp edge sitting in the crease of the fold, trim it to size and tape it closed. Then wrap the knife and its guard in bubble wrap or packing paper. This is the approach described by a knife sharpening and sales shop’s shipping guidance, and it adapts well to household knives.
Here is how to do it for a chef’s knife:
- Cut a strip of corrugated cardboard about twice the width of the blade and slightly longer than the blade.
- Fold it in half lengthwise, with the corrugation ridges running along the fold.
- Slide the blade into the fold so the cutting edge sits tight in the crease and the spine sits at the open side.
- Tape the guard closed along its length and across both ends. Tape twice around the tip, where the knife is most likely to push through.
- Leave the handle exposed for now.
For serrated bread knives, use a thicker guard or double the cardboard. The teeth catch on paper and tear it.
Step 4: Wrap each knife individually
Now wrap each guarded knife as a single bundle.
- Lay out two or three sheets of packing paper at a corner angle.
- Place the knife near one corner with the handle toward you.
- Roll it up, folding in the sides as you go so the paper covers the tip and the handle.
- Tape the bundle in several places.
- For a valuable knife, add a layer of bubble wrap over the paper.
Do not skip individual wrapping and just bundle several knives together with one rubber band. Knives in a loose bundle rub against each other during transport, which dulls and chips edges, and a single failed tape point exposes several blades at once.
A knife block is a tempting shortcut. Moving a block with the knives still in the slots invites them to slide out when the block tips. If you want to keep the block, remove the knives, wrap them as above, and wrap the empty block separately. Magnetic strips and in-drawer trays can go in the same box once the knives are packed.
Step 5: Choose the right box and pack it tight
Use a small box. Knives are dense, and a large box invites you to add heavy items that make it hard to carry. A small book box or a dedicated knife box works well. Reinforce the bottom with extra tape.
- Line the bottom with a layer of crumpled paper or a flat sheet of cardboard.
- Lay the wrapped knives flat, in a single layer, with all the handles pointing the same direction. This makes it obvious where the blades are when someone opens the box.
- Press crumpled paper between and around the bundles so nothing moves.
- Add a second layer only if the first is completely filled and level, with another cardboard sheet between layers.
- Fill the top with paper so the contents are snug when the flaps close.
- Shake the box gently. If anything shifts, add more filler.
For a longer discussion of how heavy items behave in transit, see our guide to packing fragile items for long distance moves, which explains why we cap fragile boxes at 45 pounds. The same logic applies to knife boxes: a small box is easier to keep upright and less likely to be thrown or dropped.
What not to do
- Do not pack knives in the same box as dishes or glassware. A shift can send a blade through a wrapped plate.
- Do not put them loose in a drawer you plan to move with the contents inside.
- Do not rely on a rubber band as the only guard.
- Do not wrap blades in thin plastic wrap alone. It stretches and the edge cuts through it.
If you also need to pack the plates that sat next to your knives, the museum-method approach to packing dishes covers them separately.
Step 6: Label the box so nobody gets hurt
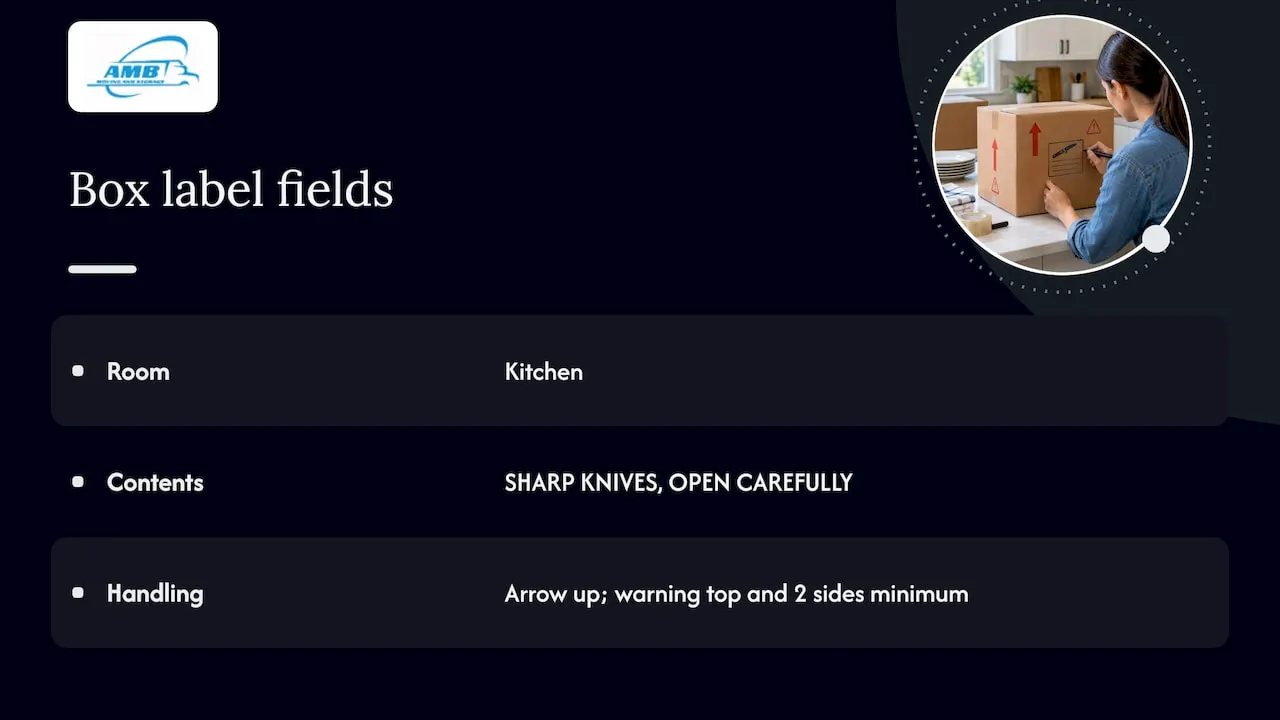
A knife box that looks like any other kitchen box is a hazard. Use a marker to write “SHARP KNIVES, OPEN CAREFULLY” on the top and at least two sides. Add the destination room, “Kitchen,” and an arrow showing which side is up.
On a large interstate move the box will be handled by crews at pickup, in transit and at delivery, and you want everyone to see the warning immediately. A three-layer labeling system (room, contents, handling) is explained in our guide on labeling moving boxes. The principle that every item needs a traceable identity from the first box to the last is also what makes professional pack-outs work; a pack-out chain of custody explanation shows how documenting and labeling each box keeps sharp or valuable items accounted for.
A practical addition: put one clear mark on the box if it holds your best knives, so you can confirm at delivery that this specific box arrived intact. Open it first and check the contents.
Step 7: Keep the knife box accessible
Where the box rides matters as much as how it is packed.
- Moving yourself in a car or truck: place the box upright where it will not be crushed or tip. Do not put it in the passenger compartment loose where it could slide in a sudden stop.
- Hiring movers: tell the crew at the start that there is a knife box. Better, hand it to the crew lead directly or mark it “Load last, unload first” if you want it early.
- Flying to your new home: do not carry knives in a carry-on. TSA says that, apart from plastic or round-bladed butter knives, knives are not allowed in carry-on bags and must go in checked baggage. Pack the wrapped, boxed knives in a checked bag, or send them with the household shipment.
- Mailing knives: if you ship them instead of moving them with the truck, USPS requires sharp-edged instruments to be securely packaged in a strong container with cushioning, and there are separate restrictions for switchblades. Check that page before you mail anything.
If your new home is not ready, you may want the box in storage for a while. Label it clearly there too; our storage solutions checklist explains how to keep stored boxes organized and findable.
Step 8: Unpack carefully at the other end
Open the knife box first, before the kitchen fills with other boxes. Cut the tape on the outside of the box with a short, shallow cut so you do not slice into the contents. Remove the filler paper, then lift out each bundle by the handle end. Unwrap away from your body, over a counter, and remove the cardboard guard by pulling the tape off rather than cutting along the blade.
Wash the knives before first use, as they have been through dust, paper and transit. Put the guards and paper in the recycling, and keep the blade guards if you plan to move again or store knives in a drawer.
Special cases
Expensive or collector knives
Use a three-layer approach: the guard, a paper wrap, then a bubble wrap layer, with each knife in its own small box or a divided case. Photograph the knives before the move and note any existing nicks, so if there is ever a claim you can show condition. Consider carrying the most valuable ones with you where the law allows.
Cleavers and long slicers
These are heavy for their size. Use a double cardboard guard and tape generously. Pack them at the bottom of the box with the handle ends together, as the weight is concentrated in the blade.
Kitchen shears, mandolines and graters
Shears should be closed and taped shut, then wrapped. Mandoline blades should be removed if the design permits, or the whole unit wrapped in a thick layer of paper and boxed alone. Graters and peelers have edges that cut paper, so wrap them in a double layer.
Steak knives and flatware sets
If they are in a wooden or plastic case, tape the case shut and wrap it as one unit. If they are loose, treat them like any other knife.
Knives that movers may decline
Movers do not generally refuse kitchen knives, but some items on a household inventory can be restricted. Our checklist of items movers will not move lists what to sort out before a crew arrives, so you can plan the rest of your kitchen at the same time.
How much time and money it takes
Packing a full kitchen’s knives takes about 30 to 60 minutes if you have the materials ready. The materials cost little: cardboard from a spare box, a roll of paper and some tape. Plastic blade guards are an inexpensive upgrade if you own many knives.
If you do not want to do it yourself, professional packing is an option. Our packing service is priced from $1 to $2 per cubic foot, and specialty item handling for things like pianos and safes starts at $200. Published rates and fees such as stair and long carry charges are on our moving cost guide. For a whole-home quote with packing included, request moving cost estimates here.
Our perspective: knives are a small item with a big consequence
On long-distance and interstate moves, a single mislabeled box can cost a crew member an injury or a customer a set of ruined dishes. We see more trouble from poorly packed small items than from sofas. Knives, tools, and glass are the usual culprits, because customers pack them last, in a hurry, into whatever box is left.
Our view is simple. Pack sharp items first, not last. Use a small box. Mark it in plain words. And tell the crew about it. A mover who knows where the sharp items are can handle them correctly, and a customer who has labeled them clearly helps the whole team. When a customer hires us for packing, our crews wrap kitchen knives and other sharp items as a standard part of the kitchen pack, using the same guard-wrap-box sequence described here, and they label the carton for the delivery crew. When a customer packs their own, we ask only that the knife box be clearly marked and not buried.
We are licensed and insured, and we would rather prevent a damage claim than settle one. If you are weighing how much of the move to pack yourself and how much to hand to professionals, our guide to protecting belongings during a move is a good place to decide.
— AMB
Let professionals pack the kitchen
Knives are one box among dozens in a kitchen, and a kitchen is usually the slowest room to pack. If you are planning a long distance moving job, or working with interstate movers on a schedule 30 to 60 days out, our professional packing services cover the kitchen, including sharp items, so you can focus on everything else.

As a nationwide moving company, we handle cross country moves for families and businesses, with packing, storage and delivery coordinated under one contract. Ask for a quote and tell us about the kitchen, and we will include the packing in the estimate.
Quick checklist
- Sort, clean and dry the knives.
- Guard every blade with a sheath or folded corrugated cardboard.
- Wrap each knife on its own in paper, and add bubble wrap for good knives.
- Pack flat in one small, sturdy box with no empty space.
- Label it “SHARP KNIVES” on multiple sides.
- Keep it accessible and tell the crew.
- Check airline and postal rules if you are not moving the box on the truck.
- Open it first at the new home.
FAQ
How do you pack kitchen knives for moving without a knife block?
Cover each blade edge with a sheath or a folded strip of corrugated cardboard taped shut, then wrap the whole knife in packing paper. Lay the wrapped knives flat in a small box with crumpled paper between them so nothing shifts. Label the box “SHARP KNIVES” on several sides.
Can I move knives in a knife block?
It is better not to. Knives can slide out of the slots if the block tips, and the block does not protect the edges from each other. Remove the knives, guard and wrap each one, and wrap the empty block separately.
Can I take knives on a plane when I move?
Not in a carry-on. TSA says knives other than plastic or round-bladed butter knives must be packed in checked baggage. The safer choice for most families is to send wrapped, boxed knives with the household shipment.
Can I mail knives to my new address?
In many cases yes, but USPS requires sharp-edged items to be securely packaged in a strong container with cushioning, and it restricts switchblade knives separately. Read the USPS packaging rules before you ship, and use a guard and a rigid box.
Will movers pack my knives for me?
If you hire packing, a professional crew will wrap and box them as part of the kitchen. At AMB, packing is a priced service, so ask for it in your quote and tell us about any valuable or specialty knives so they get extra protection.
Sources
- How should I package my knife to ship it to you? (Stone & Steel)
- Utensils (Transportation Security Administration)
- 443 Packaging and Marking (USPS Postal Explorer)